We decided at the beginning of the summer that we wanted to change the look of our home. We have a large front room that has been used as a toy room since we moved in. We are sick of it! When we have people over- it always looks like a mess. There is no real storage for the toys, and while the kids love it, I just want people to see something different when they enter our home. So we decided to swap the toy room and the office!
In addition to redoing the kids toy room and office, we decided that were going to build the kids a Lego table to give them a spot to keep some of their most favorite toys. They can play for hours with their legos and are so creative with the things they build. We wanted to give them a practical space to work at instead of a HUGE pile of legos spread on the floor.
In addition to redoing the kids toy room and office, we decided that were going to build the kids a Lego table to give them a spot to keep some of their most favorite toys. They can play for hours with their legos and are so creative with the things they build. We wanted to give them a practical space to work at instead of a HUGE pile of legos spread on the floor.
We started with getting some ideas from Pinterest and figuring out what we wanted. Things that were important to us:
1. Tall enough that they can sit in a regular chair to build
2. Big enough to be useful
3. Sturdy! (Ethan-proof!)
4. A storage bin in the center to store some Legos
5. Built-in Lego Plates, but some smooth areas for various types of building
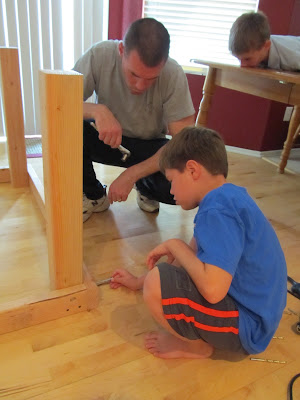
After a trip to Home Depot, we got started! Chris first took all the wood over to his dad's house and cut everything to the correct size. He brought it home and put it together.
Next it was my turn to work on the table! I applied wood filler to all the nail and screw holes as well as a large knot-hole in one of the legs.
 |
| See the huge chunk of wood out of the table?! |
 |
| Filled in with the Wood Filler |
And when it dried, I had to sand everything down to make it smooth for priming.
I used an oil based primer called Zinser. I painted a thin coat, let it dry overnight, sanded it down, then painted another thin coat. This should have been a quick process but I was also working on the big craft cabinet and living life in between. This project seemed to take forever!
 |
| Look how great that wood filler worked on this table leg! You can't even tell there was a huge hole there! |
Once I was done painting, Chris applied the lego panels using a liquid nails type glue. We stacked heavy books on top to help hold the lego panels down.
Once the panels were dried we dropped in the bucket for Legos and we were ready to go!
Our finished product!
Some shots of the playroom. We have 2 stacks of clear plastic bins to store all the Legos in. The Ikea shelf and baskets hold Imaginext guys, dinosaurs, and remote control cars. I also got the neat Art Display Line at Ikea to show off their artwork.
The bookcase in the corner is for the boys to show off their Lego Creations or anything else they want to keep around. We still have the colored bins for the various other toys we still have.
So far it is working out great- and it is so nice to be able to close the doors when we have people over and don't want them to see the mess! We still have a bit of decorating and poster hanging to do, but it is just about done! Yea!


I think this is the way we are going to go with our Legos..... I finally got the organizing and storage down for now, but I want this table!! Would you mind sending me the measurement of the top square? My husband said the rest is easy enough to figure out, but wants to know the size overall. Thank you., Dena Riddle denariddle07@gmail.com
ReplyDeleteoh.....and now that you have had it for 2 years, is there anything you might have done differently with it?? Thank you.
ReplyDelete