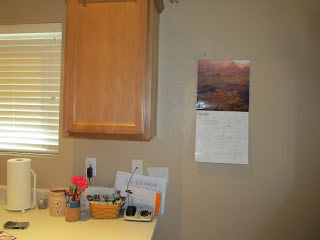
I have been trying to work on some home improvement projects to update the house and make things look a bit more organized. One spot that really bugs me is my kitchen counter dump spot! I have this big gap on the wall with a calender in the middle- useful but looks terrible! I also shove all important papers behind the phone base and it just looks messy and cluttered. I also have been trying to come up with a visible chore chart for the kids in one of the main areas of the house. I decided to take a few objects from around the house and spruce things up a bit.
Pictures of the current situation:
I found an old cork board that I have been using in the office for the last 20 years or so. It had an old Oak-wood edge and the cork is coming apart in a few places. I also took an old dark wood colored bill rack that I had marked for Good will since I had nowhere to put it. I primed the edge of the cork board and then spray painted them both a nice bright red!
I found this cool paisley fabric at Walmart. It has all the colors I am using in my new color scheme for the great room. I cut the fabric slightly larger than the board so I could tuck the edges under.
I used School Glue to glue the fabric to the board and then tucked the edges under with a putty knife.
After that I went to work on the Chore Chart. I knew I wanted to have the boys doing a set of chores and rotate them out weekly. I didn't want a daily check-sheet because after trying various systems, I just feel like that is kind of a waste of time. As long as they know they are responsible for that chore for the whole week, I am good with it. We rotate chores every Sunday.
To make the chores buttons, I used paint swatches in coordinating colors from Lowe's. I used my circle cutter to cut them down to size, then a sharpie to write the chores on them. I inked the edges to make them look neat and then laminated them and cut them down to size again. Then I attached magnets with school glue and let them try.
I bought a metal strip from Home Depot and used Gorilla Glue to attach the board to the fabric-covered cork board. I labeled the board and separated it into 3 sections- 1 for each boy.
I attached the bill rack, a large nail for to hold the calender, and a small dry erase board for notes .
The finished project!
I love it! It has been working out really well, has really made the kitchen look neat and organized, and adds alot of color to the wall. Love, love, love it!


No comments:
Post a Comment